“Creating digital surrogates for 10,000 negatives will facilitate improved access and significantly reduce the impact on the original negatives. The newly digitised material will also provide inspiration for our activities. A digital master archive image will be produced at a high resolution which will minimize the need for subsequent rescanning and retains the maximum amount of data. This RAW mastered file will be immediately archived.”
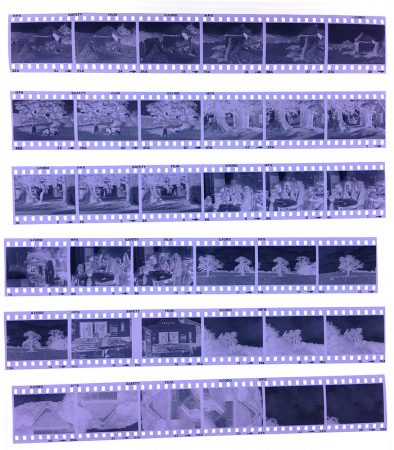
James Ravilious Negative Sheet
Photographic negatives hold far more image information than the resulting print. There is a far greater range of grey tones, and the photographer chooses how much or how little of this information is to be made visible in the final print. The amount of contrast is controlled through choice of grade of printing paper, 1-5, where 1 is low and 5 is high contrast; or through using variable contrast paper in combination with coloured filters to produce a similar result. Brightness and darkness of tones is achieved through the time exposure of the paper to the enlargers light, focused through the negative. And a fine control of exposure here is achieved through ‘dodging’ and ‘shading’, where the photographer can selectively darken or lighten areas of the print through selective exposure to light. The photographer desires an information rich, full tonal range negative, one which is correctly exposed and developed, for the greatest opportunity to create a fine print from it.
A negative isn’t created in digital photography, the closest thing we have in terms of an image file which holds greater information than our final print is the RAW file. The RAW file holds more visual information than is possible to see in a print and, similar to the negative, the photographer can select what to include in the final digital image or print.
“In line with recommendation from our Digital Consultant, Elizabeth Fife-Faulkner, we will employ the photographic capture method. This method allows faster image capture than the traditional flat-bed scanner method, produces higher quality results and is fast becoming the industry standard. In addition, the method reduces the instances of static, a significant issue for archive materials and in particular for 35mm photographic negatives.”

Recommendation for copying negatives
Most of the Digital Consultant’s recommendations were implemented but a popular method of copying a negative or slide using a camera, bellows, a lens and flash was hotly debated right at the onset of the Hidden Histories Project. The concern with this method was that of contrast, the longstanding digital printers of the Beaford Archive images at Focal Point in Exeter suggested that a LED light source would be lower in contrast and therefore help produce a greater range of tones in the digital copy. This was also in keeping with James Ravilious’ preference for old uncoated lenses for his Leica camera because he disliked the modern higher contrast lenses.
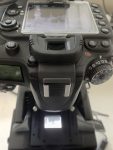
Bowens Illumitran
Focal Point were able to convert an old Bowens Illumitran Slide Copier, which originally had it’s own flash light source, into an LED copier more suited for our needs. This cobbling together of the best of old and new technologies was very much in keeping with the spirit of Ravilious!
Negative Digitisation Process
10,000 images of the 80,000 negatives that exist in the Beaford Archive, roughly 1000 of Deakins and 9000 of Ravilious, were selected by a curator from the contact sheets I had scanned and created digitally. This information including negative number, description, date and notes, was received on an Excel spreadsheet.
Once the apparatus was set up, cleanliness and keeping surfaces dust free were key through regular dusting with compressed air. Negatives, which are removed from their archival sleeves by their sprocket holes with tweesers, were only handled by their edges.
The guys at Focal Point recommended that the optimum lens was a Rodenstock 60mm f4 enlarger lens. I discovered that it’s ‘sweet’ spot, where the grain of the negative was in focus right to the corners was between f8 and f11. My natural instinct had been to close the lens right down to f22 but this resulted in a softening of the image.
Once an exposure was achieved with a slight clipping of the negative’s highlights (a prints shadow image) I bracketed the RAW exposures by a third of a stop each way. Photographic film base for Ilford HP4 and later HP5 is the same density and so the only variation on exposure is through fogging to light or the occasional fixer stain. Many of the films have a variety of exposure and over/under development but this doesn’t affect the copying exposure to digital a great deal.
I then worked in batches of 10 films at a time which, at 4-5 pictures per roll that the curator had chosen, equaled approximately 45 images per folder. This gave me both a simple, straightforward filing system and a reasonable number to invert to positive images, adjust levels of exposure and spot out dust, scratches and hairs later on. (I’ll go into this in detail in a future post). After every batch I checked the focus and made adjustments if needed. The images were downloaded and a best of the 3 bracketed exposures was saved for each image. The Nikon RAW NEF files were converted to RAW .dng files because this format is considered universal and more archival because it isn’t associated with a particular camera brand. These files were then immediately backed up so that duplicates existed.
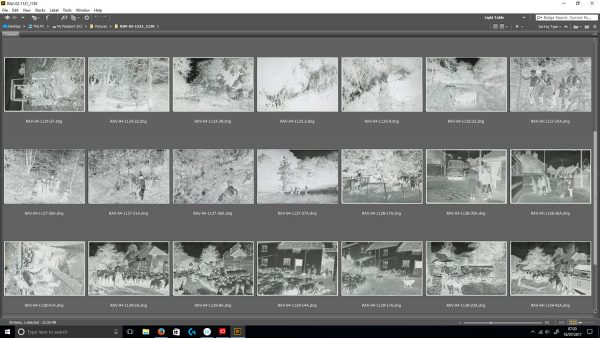
Ravilious digitised negatives viewed in Adobe Bridge
Digitisation Part 4 Thoughts on Ravilious and Deakins at Beaford