1st computer generated photomosaic using Artensoft Photomosic Wizard and random images
Art is rarely just created solely for the artist, often made as a commission or gift, but the majority of art sits in the public realm. Historically this was the gallery wall, the open studio, civic building or hotel lobby; but now even amateur artists and hobbyists can publish their latest work to potentially a mass audience through social media, the art critic’s judgement replaced by peer reviews and the number of likes it receives.
“Public art is art in any media that has been planned and executed with the intention of being staged in the physical public domain, usually outside and accessible to all.” Knight, Cher Krause (2008). Public Art: theory, practice and populism. Oxford: Blackwell Publishing.
Having a piece of sculpture installed into a city square by contractors is a typical example of public art but my experience of making a piece, in the 12ft x 5ft empty frame of a boarded up window, in a very public square over the course of 4 weeks takes ‘public’ to a new level.
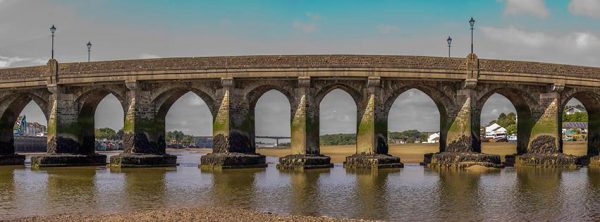
The original image made by stitching 6 frames together with Photomerge in Photoshop
The work, a photomosaic, was conceived 6 months prior to the installation, and submitted to Bideford Bay Creatives for inclusion in their Culture Show ‘art in non-gallery spaces’ for August – September 2015. Once the concept was accepted permission was obtained from the shop manager of McColls locally and nationally and of the building owner to use the blanked out windows for the piece. Permission was given so long as the artwork was temporary or was easily removable in the future.
As this was to be public art I wanted the public to be part of it hence the idea of a photomosaic which I estimated could be made from 700 to 800 separate images, many of which could come from the public realm. I had never made a photomosaic but my arts practice over the last 20 years, from triptychs made with a film camera to detailed interiors of sea caves have been achieved through constructing an image from many frames. I have also been teaching photography through this period and wanted there to be a learning element to the work also. With this in mind I approached Devon Youth Service in Bideford as a partner in the project so that local young people would get the opportunity to experience the photographic arts process and see their photographs in a public space.
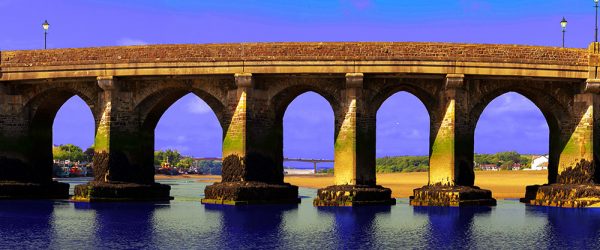
Colour was intensified through hue adjustments and increase of saturation
Through experimenting with Artensoft Photo Mosaic Wizard software it became clear that a colourful, high contrast, graphic image would be needed to base the mosaic on. The theme of Culture Show was the River, and so I wanted to use Bideford’s iconic, historic longbridge, which dates back to the 13th century to build the work from.
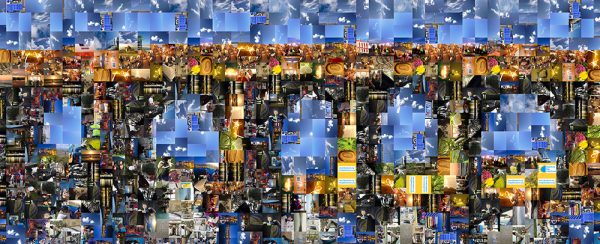
Early attempt at computer generated photomosaic to determine which images worked the best
The ‘frame’ I needed to fill was wide-screen in shape so I needed a view of the bridge head on, much like it is in Bideford?s coat of arms, however this is a view rarely seen as you need to be in the middle of the river to see it. I took up the challenge on a very low tide with sunshine highlighting the uneven arches of the bridge; and walked to the middle of the channel using a bamboo cane to check for sinking sand. Conscious of the incoming tide the initial photographic panorama was made very quickly. These images were stitched together in Photoshop?s Photomerge enhanced in Lightroom and then the saturation was increased to give me the graphic representation I was hoping for.
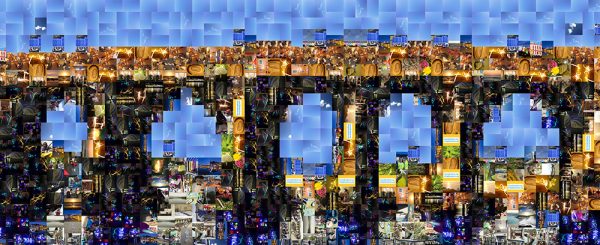
Final Artensoft photomosaic that was used as a guide for the artwork