blog-image

Digitisation part 2: Roger Deakins’ Contact Sheets

“Deakins’ negatives are not accompanied by an exhaustive set of contact sheets. A digital contact sheet will therefore be made with a scanner before being digitised. This will be a more lengthy process than the Ravilious collection requiring more time allowance.”

The statement above was the shortened version of my project brief for Beaford Arts Hidden Histories, a project funded by the Heritage Lottery Fund and Leader 5 North Devon. Contact sheets do not exist for Roger Deakins work, he did make them but cut them into strips and slotted them into negative bags with numbers removed. Although his contacts need preserving, and ultimately digitising for the archive, they are useless for the digital database without being able to identify unique negative numbers.

Unlike Ravilious, there was no numerical labelling of Deakins’ negative bags, so I started the process of making new ‘digital’ contact sheets with the first of four folders of negative bags. These negatives were housed in their original archival, but translucent, paper negative bags, often with written notes marks and connotations. Under close inspection on a lightbox I could see that negatives were often filed in a random order, sometimes up-side-down or reversed, sometimes the same number appeared twice and on one occasion 3 times. It became clear that a negative bag didn’t necessarily contain one film, one specific shoot, location, person or group. In comparrison to Ravilious’ contacts there appeared a randomness, or chaos, to his negative filing. However on closer inspection a thematic approach eg ‘railway stations’ had been taken. The negatives themselves were generally in very good condition for their age, with only a few which had stains through poor fixing or washing.

The negatives would ultimately need re-bagging in a comparable fashion to James Ravilious, clear plastic archival bags (this would also be necessary for making digital contact sheets through scanning), so in consultation with Beaford and the Devon Archives Conservator, I went about consolidating the negative strips and making new collections based on single films. This was very time consuming because Deakins (like Ravilious) often loaded his own 35mm canisters of film from a bulk roll so the first negative on a roll could be any number from 0 to 40 and each roll could be any length from approximately 12 to 38 frames.

I made the new digital contact sheets through scanning Deakins’ negatives, held within clear file pages, on the project’s Epson 800 Perfection V800 scanner. This time is was set to scan transparencies at 600 dpi, large enough to be able to identify the place and/or subject in a photograph and to see those images in the context of the photoshoot, but small enough to make physical and data base storage practical. It was also within the independent consultant’s recommendation and the scanner’s linear relationship between quality and time: whilst a negative sheet was being scanned there was just enough time to make minor adjustments to cropping, exposure and contrast of the previously made digital contact sheet.

This was the most exciting and rewarding part of the project to date because I was able to see, as a positive image, that which had only existed as a 35mm negative since 1972. I wonder how many great images from yesteryear have been lost, because the 36x24mm negative or contact image had been brushed aside or unnoticed through their size, or poor exposure. Seeing each of Deakins’ images, with corrections made to exposure and contrast, 24cm wide on my computer monitor brought them to life. If only this technology was available when I was shooting film myself!

I had earlier written how Deakins’ negatives themselves were generally in very good condition for their age; however once the digital contacts had been made it became clear that some suffered from poor developing and light leaks (and in the case of the example above, double exposure), reminiscent of Robert Capa’s celebrated D-Day Landing photographs in the example below. After discussing the issue with the Hidden Histories coordinator we decided, rather than attempting the difficult and time consuming task of perfecting these faults through Photoshop, that we should embrace their endearing, nostalgic qualities; only digitally correcting damage to the negatives post processing.

Digitisation Part 3 Making copies of negatives

blog-image

Digitisation part 1: James Ravilious Contact Sheets

I’ve started an 18 month freelance contract for Beaford Arts. My work is to digitise 10,000, 35mm, black and white negatives, of James Ravilious and Roger Deakins. These date from 1971 to 1989 and cover all aspects of life in rural North Devon.

Bowens Illumitran converted to LED for copying negatives is on the right of the image

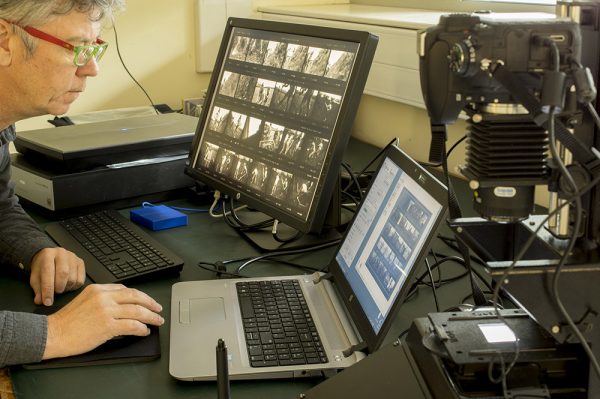
The archive of negatives is held in a climate controlled, fireproof, strong room at the Devon Heritage Centre in Exeter. This is where the negatives must be kept and downstairs in a conservators office is where I have my work place seen in the images above.

“..James Ravilious’ work includes a complete collection of contact sheets made by the artist. These will be digitised by the Digitiser using a flatbed scanner. Most contact sheets will be straightforward scans, however, some have overlapping images and exposure issues to resolve in digitisation.”

“All Ravilious contact sheets will be digitised to a high enough quality to enable negative selection to take place and research and background data to be gathered without repeated handling of the original contact sheets. ‘Good’ and ‘Best’ images will be marked up on digital contact sheets by the Digitiser, referencing the original database, to ensure easy reference and prevent repeat selection. Two sets of digital contact sheets will be made one for negative selection, and one left unmarked to reveal James’s original markings only, for dissemination purposes. Tests suggest scanning contact sheets at 600dpi enables high quality images suitable for on-screen viewing purposes.”

James Ravilious started his commission from Beaford Arts to “show north Devon people to themselves, in 1973, continuing the Beaford Archive started a year earlier through Roger Deakins (who became the great Hollywood cinematographer). The first two months of my contract have been spent scanning all 2306 of Ravilious’ contact sheets on an Epson Perfection V800 Scanner. This was the first stage of the process to archive the contact sheets digitally so that in the short term a curator can select approximately 9000 of his images for digitisation and in the long term the digitised contact sheets can be themselves searchable items in a database. Ravilious worked right from the start with an archive in mind; archivally processing his negatives as best he could (developing, fixing and washing his negatives in an often difficult, imperfect working environment) and numbering, filing and storing his negative bags and contact sheets. He also annotated his contact sheets on their face and rear indicating his prefered best images, description of place, name of subject etc.

A small percentage of the contact sheets (and negatives) had been archively rehoused in separate new folders prior to my start which speeded up the digitising process. However once I got to view the contact sheet and negatives together in the same folder I noticed some negative strips and many ‘end of film’ negatives which didn’t make it onto the contact sheets. I started to make digital copies of these to add to the digitised contact strips but then abandoned this extra time-consuming work, marking negative bags with ‘post-it’ notes for later in the life of the project.

There were 2 or 3 sets of negatives, and occasional single frames, which had yellowed through under fixing or inadequate washing at the original time of processing the film. These films are not archival and will not last in the long term and will need re-fixing and washing in the coming weeks.

Although the negatives were all black and white I scanned them in colour to preserve the highlighted annotations, often in red pen. However, the drawback of the colour scan was often a slight colour shift towards green or blue, so a selective colour desaturation was applied in Photoshop afterwards. There were also handwritten annotations on the rear of Ravilious’ contact sheets which will need digitising and archiving later in the project.

Today, photographing digitally, one gets used to getting a ‘correct’ exposure. Most people now shoot everything automatically and today’s technology enables us to achieve excellent exposures for most of our photographs. Even professionals, myself included, who use a camera manually, are used to checking our pictures at the time of shooting so that any adjustments to exposure can be made there and then. These same professionals will benefit from incredible advances in sensitivity to light when taking pictures, in comparison to the 100-400 iso films used by Ravilious in the 1970’s & 80’s; and also shoot in RAW, benefiting from its greater exposure tolerance. So it shouldn’t have come as a surprise to find James Ravilious’ contact sheets having both inconsistent exposure, one to the next, and having under and over exposure within a single film. But it did, because the last time I photographed on film was last century, and my last monochrome film was probably at the time Ravilious finished his work for Beaford Arts.

Therefore, digitising James Ravilious’ contact sheets, preserving them archivally for eternity, was a greater task than it seemed. Each sheet needed slight adjustments to exposure at the scanning stage through tweaking the levels of the histogram. Each digitised sheet needed adjustments for some of its images. These adjustments were not to perfect the images, or ‘make good’ his exposure, but to enable a reader of the digital contact sheet to be able to see what the image was, and in the short term to enable the project curator to identify images (negative) to be digitised.

I feel quite privileged to be one of probably only a handful of people to have seen 9,000+ of James Ravilious? images, albeit small and with little detail, and to have gained an insight into his working practice through seeing 2,300+ of his contact sheets made in chronological order through his time at Beaford.

Digitisation part 2: Roger Deakins’ Contact Sheets

blog-image

Bossiney Haven and Benoath Cove

Quick automated photomerge in Photoshop CC 2015

Quick automated photomerge in Photoshop CC 2015

Benoath Cove is tucked around a headland from it’s main access at Bossiney Haven. It’s beach is usually under the waves, but on a low spring tide rocky cave pierced cliffs are like heaven to me! I was there in mid-March on one of the lowest tides of the year which gave me four hours to explore and photograph. This blog post represents my sketchbook or work-in-progress as I haven’t made a finished image at the time of posting; that will have to wait until a rainy day. However my working practice includes making iPhone photo-constructions on location and I like to process my RAW images asap and then make quick, automated, photomerges from the jpegs produced.

Quick automated photomerge in Photoshop CC 2015. Making a sketch like this helps me to progress the image later on; I'm immediately wanting to lengthen the exposure of many of the darker frames to expand the overall tonal range and I also need to delicately bring out the water drips which give a sense of both the dampness and of time passing.

Quick automated photomerge in Photoshop CC 2015. Making a sketch like this helps me to progress the image later on; I’m immediately wanting to lengthen the exposure of many of the darker frames to expand the overall tonal range and I also need to delicately bring out the water drips which give a sense of both the dampness and of time passing.

I timed my visit to Benoath so that I was there two hours before low tide and took the less used, old path, down to the beach. This path isn’t way-marked and I wouldn’t recommend it; the first part was covered in brambles which are only bearable in the winter when they’ve died back and heavy jeans are worn, the second part, the decent down the cliff, is treacherous as most of it is on a steep ledge with only a rail to keep you from plunging to the beach. The last section has no handrail and just an old fishing rope, tied to the end of the rail, to help you over the steep, wet, smooth, slippery rocks onto to equally difficult beach below. I had been on the beach in the past but it was disorientating with the sea still so far in, so it took a few minutes of clambering up and down the so far accessible rocky beach, before I could find the cave I was looking for. I refer to this cave as Signal Cave because you can actually make a mobile phone call inside. I even received a text right at the very back which has to be at least 30 metre from the opening.

My reason for getting into the cave as soon as possible after the receding tide was aesthetic, the wet walls and dripping ceiling make for a far more dramatic image. This particular cave is my current favourite and I could easily have spent all four hours here, as it has three distinct entrances which all join together far into the the cliff. It takes me approximately an hour to shoot the frames for a single constructed photograph so four hours was never going to be enough on this beach as it was visually so generous.

It takes me approximately an hour to shoot the frames for a single constructed photograph so four hours was never going to be enough on this beach as it was visually so generous. These last two iPhone AutoStich images will have to wait to photographed properly! The first I entered with only a few minutes before low tide, which was lapping at it’s mouth, and I had to force myself to leave it for another day (I know how obsessive I can be to perfect the image, I knew I would be so absorbed in my work that time would disappear and I could be cut off, inside the cave!).

blog-image

Public Art pt4 – Realisation

My original intention was to have a completed piece of Public Art on McColl’s window for the beginning of August, the start of the 2 month long Culture Show.

Unfortunately the project was marred by delays. Firstly the relationship with Bidford youth club needed more time to develop and so next week was given here, then, the time needed to install the public art was far greater than originally anticipated. I had naively imagined that a couple of days work outside on the space would have got everything finished, sealed and looking good. A day was booked in the Arts Centre in early August with the intention of laying out all the images in their respective window frames end then installing them in place. I decided to use Scotch Photomount spray glue to stick the 3×4″ prints in place, despite its high price, because it allowed for a little repositioning but was a permanent glue, and it was tried and tested by me in the past. A couple of volunteers, who had participated on BBC workshops in the past, Stuart and Shirley Stickler helped with this process. However after a whole days work only half of one panel was complete and this needed to be varnished straightaway to protected from the weather.

The weather was another important factor in the delay of installing the artwork. August 2015 proved to be very wet in Southwest England. It was rare for a day to go by without a shower of rain. This rain played havoc with my outdoor work which needed extremely dry conditions until it became protected from the rain. Confounding this situation with wetness, when it wasn’t raining it was often very sunny, the sun shining directly onto the windows and making them very hot indeed. The black-and-white A4 card that had been pasted onto the window has shrunk slightly around the edges. Some of them had also started to peel from at the edges from the flat surface, and I needed to add stronger glue to hold them in place.

Another issue, which caused delay, was the varnish. I had spent a lot of time researching varnish, needing something that would give UV protection and protect the work from the rain outdoors. The yacht varnish that I bought was supposed to be clear, but when applied and dried it gave a yellow skin to the work making the images seem faded, like an old photograph. My experience of using varnish indoors on similar work in the past had been very very successful. The varnish from my previous experience had completely sealed the photographs, like a lacquer or resin might have done. I decided to remove the worst offenders of the yellowed pictures and replace them with new ones. I also ordered a clear spray on varnish that seemed to have very good reviews on the Internet being designed specifically for artwork. However this spray on varnish didn’t seal the images as I had hoped and I found that with bright warm direct sunshine often the corners of individual pictures curled upwards.

My cycle of work was that every time there was to be a dry day I would spend the whole day working on the panels. Gluing down any corners that may have curled up, spraying pictures in place and then, by the end of the day stopping only for lack of sunshine, I sprayed the whole lot with clear varnish to seal.

As the artwork started to evolve in the very public space I would often and sometimes continually get members of the public coming up and asking what it was, or commenting on how they liked it, or questioning what it was for? This was a thrilling, but unexpected part of making art work in the public realm. A part of making public art which I recognise as very important but had not factored in the time needed to talk to people who were interested in what I was doing. Having the public’s enthusiasm for what I was doing made the arts practice very rewarding. I was fascinated by the fact that so many people came over looking at the work but could only see small pictures on the window some on their side, some upside down, but they could not see the big picture. It was only when they walked away, viewing it from a distance, that they saw it as a photo mosaic of Bideford Longbridge. When questioned what the image was supposed to be I would often show them how it looked through the wide angle lens of my iPhone and they would instantly see the bridge.

Once all three panels were complete I waited for a very dry day when I knew that everything was absolutely bone dry and then sealed the whole lot under clear sticky back plastic. The clear plastic film was then trimmed all the way around the edge and sealed with exterior white sealant.

The completed Photomosaic on Jubilee Square in Bideford.

blog-image

Exhibition at Sock Gallery 29th October – 5th December 2015

Over the last 25 years I?ve exhibited my work all over England, and also a few places in the USA, but never in my home town of Loughborough. Encouraged by my parents, who still live in the family home, I approached the Sock Gallery in Loughborough Town Hall over 18 months ago and was fortunate to be given this slot in their calendar. I have fond memories of Loughborough Town Hall having seen Def Leppard play here in 1979.

The gallery here is a wonderful place to show work; clean, light, well lit and well looked after. They even added vases of flowers which seemed to compliment the colours in the work! The 3 day exhibition turnaround is impressive; one day for the old show to be taken down, the next for filling and painting of holes, the third for hanging of the show. As an artist I was also impressed with the efficiency of the Sock gallery staff; communication was very good and Excel worksheet which self-generated picture labels and a sales sheet was well thought out.
Sock Gallery, Loughborough